Wednesday, November 30, 2011

Apple Pie


This is another dessert that I brought to our Thanksgiving celebration this year.  When I make apple pie, I usually make a streusel-topped version, but this time I decided to try something different.  I ended up going with the Double Two-Apple Pie recipe from the Flour cookbook, by Joanne Chang.  As I've said before....I'm not a pie-crust-making person.....at least not yet......maybe 2012 will be the year that I conquer my fear of pie crust.  Instead, I used the pie crusts that Trader Joe's have in their freezer section.....they absolutely tast homemade to me!

I also didn't follow the recipe's directions on making a lattice-top for the pie.   I had been seeing a beautiful leaf-topped pie all over Pinterest, and decided I wanted to try that with my little cutters I got from Williams-Sonoma.  I busted out my little leaf cookie cutter and cut out about a million leaves and placed them over the top of the apples with a little water to help hold them together.  I finished with an egg wash and a sprinkle of sugar.  Here's a shot of the pie before it went into the oven.....


DOUBLE TWO-APPLE PIE

1 box store-bought pie crust (2-pack) or your favorite recipe of Pate Brisee (you may need more than one pie crust for the leaves, depending on the cutout size)
2 large Granny Smith apples, peeled, cored, and sliced 1/4 to 1/2 inch thick
2 medium Macintosh or Rome apples, peeled, cored, and sliced 1/4 to 1/2 inch thick
3/4 cup packed light brown sugar
1/4 cup unbleached all-purpose flour
1/4 teaspoon kosher salt
Pinch of ground cinnamon
1 egg, lightly beaten
2 tablespoons sanding sugar, pearl sugar, or granulated sugar

Roll out one of the pie crusts to fit a 9-inch pie pan.  Gently press the dough into the bottom and sides of the pie pan, leaving a small lip at the edge of the pan.  Place the pie shell in the refrigerator for at least 30 minutes.

Preheat the oven to 350 degrees.

Line the pie shell with parchment paper and fill the shell with pie weights or dried beans, and blind bake for about 30 minutes, until shell is a light brown.

In a medium bowl, combine the apples, brown sugar, flour, salt, and cinnamon, toss until the apples are coated evenly.  Let this sit at room temperature for about 30 minutes so that the apples soften (allows you to pack more of them into the pie).

When the pie shell is done baking, remove it from the oven, and take out the pie weights and parchment  paper.  Pile the apples into the shell, pressing them down to fit more in.

Roll out the other pie crust and using a leaf cookie cutter, start cutting out leaf shapes, as many as you can.  When you have cut all of the shapes out, start attaching them to the outer edge of the crust, dipping your finger in water as you go to help adhere them to the crust.  Continue attaching the leaf cut-outs, moving in concentric circles toward the middle of the pie.  Make sure that you leave small gaps here and there to let the steam escape.

Brush the top of the crust with the beaten egg, and then sprinkle with sugar.

Bake for 1 hour and 10 minutes to 1 1/2 hours, or until the pie is golden brown.  The apples should be soft and easy to piece with a small knife.  Let cool on a wire rack for at least an hour before serving.  Serve warm or at room temperature.

The pie can be stored in an airtight container at room temperature for up to 2 days.

Enjoy!!

This post is linked to:

Monday, November 28, 2011

Oatmeal Milky Way Brownie Bars


Brownies are one of my favorite treats ever.......I rarely meet a brownie I don't like.....so I'm always open to trying a new twist on them.  So here is the Oatmeal Milky Way Brownie Bar, from I Am Baker.  Since everything she makes is pretty awesome, I was pretty certain this one would come out great.....so certain, in fact, that I brought this to our Thanksgiving celebration.

An oatmeal/brownie bar with a thick layer of melted caramels and Milky Way bars in the middle....how can you go wrong?  The only problem with making them for a holiday party?  These are one of those desserts that might not necessarily stand out, look-wise, on a dessert table.....so I dressed them up with the cupcake wrappers (which also helps them to not stick together).  Maybe you could also add a little dusting a powdered sugar for a little extra something.  But once you pick up one of these bad boys and take a taste....yum......so good!

Check out I Am Baker for the recipe.....and Enjoy!

This post is linked to:
Tasty Tuesday - Crazy Sweet Tuesday - Tuesday Talent Show - T'Time - These Chicks Cooked - Link it up Wednesday - Bake with Bizzy - Turning the Table Thursday - Full Plate Thursday - Sweet Treats Thursday - Show Off Your Stuff - Sweet Tooth Friday - Friday Favorites - Anything Goes Linky - I'm Lovin' It - Fusion Fridays - Fun Stuff Fridays - Sweets for a Saturday - Friday Food - Sweet Indulgences Sunday - Monday, Mmmm....Dessert

Saturday, November 26, 2011

Happy Thanksgiving


I hope that you all had a wonderful Thanksgiving!  Our family had a terrific day down in Newport Beach with our extended family (all 38 of us!).  

I love these little monkeys!

The boys couldn't have had more fun.....although a fun day was pretty much guaranteed for them since there were 16 other kids to run around with (or do the trampoline with, which they did all day long).   Our sister-in-law did an amazing job with the tables, as usual, in spite of the fact that she had to move the tables inside because of the threat of rain (it ended up being a beautiful day).


My job this year, as usual, was to bring desserts......so I brought a bunch!  This year I brought a Bourbon Pumpkin Cheesecake, an Apple Pie, Chocolate Chip Cookie Dough Fudge, Oatmeal Milky Way Brownies, Graham Cracker Toffee Bark, and Oreo Turkey Pops.


The Bourbon Pumpkin Cheesecake is another recipe that I've had in my arsenal for a number of years, courtesy of Martha Stewart.  It's a great dessert to make for something like Thanksgiving, since you don't need a large slice of it....it is rich!  The only change I made this time around was in the crust.....instead of using graham cracker crumbs I used an equal amount of gingersnap crumbs.....just to give it an extra little zing.  I did notice that the flavor developed more when this got a chance to sit for a day or two, so it's a perfect make-ahead dessert!

BOURBON PUMPKIN CHEESECAKE
Source: Martha Stewart

For crust:
3/4 cup graham cracker crumbs (or gingersnap crumbs)
1/2 cup pecans (1 3/4 oz.), finely chopped
1/4 cup packed light brown sugar
1/4 cup granulated sugar
1/2 stick (1/4 cup) unsalted butter, melted and cooled

For filling:
1 1/2 cups canned solid-pack pumpkin
3 large eggs
1/2 cup packed light brown sugar
2 tablespoons heavy cream
1 teaspoon vanilla
1 tablespoon bourbon liqueur or bourbon (optional)
1/2 cup granulated sugar
1 tablespoon cornstarch
1 1/2 teaspoon cinnamon
1/2 teaspoon freshly grated nutmeg
1/2 teaspoon ground ginger
1/2 teaspoon salt
3 (8 oz.) packages cream cheese, at room temperature

For topping:
2 cups sour cream (20 oz.)
2 tablespoon granulated sugar
1 tablespoon bourbon liqueur or bourbon (optional)

Garnish: Pecan halves

Make crust:
Invert bottom of a 9-inch springform pan (to create a flat bottom, which will make it easier to remove cake from pan), then lock on side and butter pan.

Stir together crumbs, pecans, sugars, and butter in a bowl until combined well.  Press crumb mixture evenly onto bottom and 1/2 inch up side of pan, then chill crust 1 hour.

Make filling and bake cheesecake:
Put oven rack in middle position and preheat oven to 350.

Whisk together pumpkin, eggs, brown sugar, cream, vanilla, and liqueur (if using) in a bowl until combined.

Stir together granulated sugar, cornstarch, cinnamon, nutmeg, ginger, and salt in a large bowl.  Add cream cheese and beat with an electric mixer at high speed until creamy and smooth, about 3 minutes.  Reduce speed to medium, then add pumpkin mixture and beat until smooth.

Pour filling into crust, smoothing top, then put springform pan in a shallow baking pan (in case springform leaks).  Bake until center is just set, 50 to 60 minutes.  Transfer to a rack and cool 5 minutes.  Leave oven on.

Make topping:
Whisk together sour cream, sugar, and liqueur (if using) in a bowl, then spread on top of cheesecake and bake 5 minutes.

Cool cheesecake completely in pan on rack, about 3 hours.

Chill, covered, until cold, at least 4 hours.  Remove side of pan and bring to room temperature before serving.

Note: Baked cheesecake can be chilled, covered, up to 2 days.

Enjoy!


This post is linked to:

Sunday, November 20, 2011

My Pumpkin Pie

I know everyone has been sharing their pumpkin pie recipes this month.....so I figured it was time to share mine! I've been making this pie for about 10 years now, and although I occasionally will stray and try different recipes (last year was Dorie Greenspan's Caramel Pumpkin Pie), I always come back to this one.

This recipe is basically Martha Stewart's pumpkin pie recipe.....with one change that was a fortunate mistake I made way back when.  You see, the ingredient list for the pie included heavy cream.  If you actually read through the directions, the heavy cream was to make whipped cream to top the pie with.  However, because all of the other ingredients in the pie just get dumped into a bowl and whisked together, I happened to include the heavy cream as well.  As soon as I had realized what I had done I was thinking of dumping out the bowl and starting over.  When I realized I didn't have any other cans of pumpkin, I decided to give this one a try.

I'm soooo glad I did, because I've made it this way ever since!  The heavy cream helps the pie get a sort of custard-y lightness and texture, as opposed to the denseness that some pumpkin pies get.  It may take just a bit longer to bake, because of the extra liquid.  The hubby absolutely loves this one.......I have to keep him from eating the whole thing!

Oh, and one last thing......I usually use a pie plate that doesn't have fluted edges like this one does, so that I can decorate the crust.  Since I couldn't decorate the crust this time I decided to separately bake some pie crust cutouts (the cutters are from Williams-Sonoma), and then add them to the pie after it had come out of the oven.  It's up to you whether you make your own pie crust, or use a store-bought.  I used one from Trader Joe's this time (they're in the freezer section), and it was definitely the best store-bought crust I've ever tasted!

PUMPKIN PIE
Adapted from Martha Stewart

1 1/2 cups canned pumpkin puree
1 10-inch pie crust
3/4 cup packed light brown sugar
1 tablespoon cornstarch
1/2 teaspoon salt
3/4 teaspoon ground cinnamon
3/4 teaspoon ground ginger
1/8 teaspoon ground nutmeg
3 large eggs
1 1/2 cups evaporated milk
1/2 cup heavy cream

Heat oven to 425 degrees.  Fit the pie crust into pie pan; create the edge of your choice.  Using a fork, prick the dough all over.  Transfer to the freezer until firm, about 15 minutes.

Add pumpkin to a large bowl.  Add the sugar, cornstarch, salt, cinnamon, ginger, nutmeg, eggs, evaporated milk, and heavy cream, and whisk until well combined; set aside.

Cut a circle of parchment paper or aluminum foil, and fit into the pie shell, extending above the edges.  Fill with dried beans, and bake for 15 minutes.  Remove parchment and beans, and bake 5 minutes more.  Remove pie crust from the oven.

Reduce oven temperature to 350 degrees.

Pour the filling into the pie crust.  Return the pie to the oven to bake until all but the center is set, about 50 minutes to an hour.  If the crust gets too dark, cover the edges with foil.  The filling will be slightly loose in the center but will firm up as it cools.  Place on a wire rack until completely cool.  Transfer to the refrigerator until well chilled, about 2 hours or overnight.  Serve the chilled pie with whipped cream.

Enjoy!!

This post is linked to:
A Themed Baker's Sunday - Monday, Mmm....Dessert - Tea Party Tuesday - Tuesday Talent Show - Tasty Tuesday - T' Time - Crazy Sweet Tuesday - These Chicks Cooked - Full Plate Thursday - Bake with Bizzy - Sweet Treats Thursday - Show Off Your Stuff - Anything Goes Linky - Friday Favorites - Sweet Tooth Friday - Sweets for a Saturday - Sweet Indulgences Sunday - This Week's Cravings

Oreo Turkeys 2011


This past week I've posted some of the turkeys that I made for Thanksgiving last year, the turkey cakepops, and the Oreo turkeys.  I didn't feel like doing repeats this year, so I came up with a compromise and did Oreo turkey pops.

If you still need a primer on how to do Oreo pops, hop on over to How Does She?, and they'll give you all the basics.

To put these gobblers together you'll need:

Double Stuff Oreos
Mini Oreos
Harvest candy corn (or regular candy corn)
orange chips from a pack of Rainbow Candy Coated Chips
royal icing eyes (whatever size you want)
mini heart sprinkles
lollipop sticks
milk chocolate candy melts
dark chocolate candy melts
styrofoam blocks to place the pops in

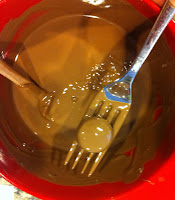
First off, you're going to make the heads of these cute little guys.  Melt the milk chocolate candy melts in a microwave safe bowl.  Take a mini Oreo and dunk it in the melted chocolate and use a fork to scoop it out and shake off the excess.  Slide the mini Oreo off of the fork and onto a cookie sheet lined with parchment paper or wax paper.

Add on the royal icing eyes, the orange chip for the beak, and the heart sprinkle turned upside down for the waddle.

Let the turkey heads cool and firm up as you move on to the body of the turkey (and the pop part).


Melt the dark chocolate candy melts in a microwave safe dish.  Line up your double stuff Oreos on a wax paper lined cookie sheets and separate the sides of the Oreos.  Take the end of a lollipop stick and dip about 1/2 inch to 1 inch in the melted chocolate then press down into the frosting of the Oreo.  Place the other half of the cookie back on top.

Once the chocolate inside the Oreo has cooled, dip the entire Oreo into the melted chocolate and gently shake off any excess.  Place the pop on the wax paper, and then carefully place one of the turkey heads in the middle of it.  Let cool and harden.


To add the candy corn feathers onto your turkeys, you'll want your dark chocolate candy melted but on the cool side, so that it will harden faster.  If the candy melts are rather warm, let it cool off a bit before proceeding.  Place a few of the pops in the styrofoam block, so that the pops are standing upright.  Break off the tip of the candy corn, so that there is a flat surface for them to stick to, and the dip the candy corn partially in the melted chocolate.  Place the candy corn on the top of the turkey in the groove where the frosting of the Oreo is, and hold till it begins to set.  If you do this when the candy melts are melted but not warm this will happen much faster.  Keep going till you're done.  I only did three candy corns per turkey because I am not patient.  If you are, then I think that five candy corns would look adorable!


Then all you'll need to do is pack these bad boys up!  I always bag them individually and then place in a basket, since we travel to our Thanksgiving celebration.


Have fun, have a very Happy Thanksgiving, and Enjoy!

This post is linked to:
Tea Party Tuesday - Tuesday Talent Show - Tasty Tuesday - T' Time - Crazy Sweet Tuesday - These Chicks Cooked - Full Plate Thursday - Bake with Bizzy - Sweet Treats Thursday - Show Off Your Stuff - Anything Goes Linky - Friday Favorites - Sweet Tooth Friday - Sweets for a Saturday - Sweet Indulgences Sunday - Monday, Mmmm.....Dessert!

Wednesday, November 16, 2011

Pumpkin Tea Cake


I've got a new favorite pumpkin bread!  I had just had one of those days last week, where it felt like nothing was going right, and the boys just seemed to be at eachother's throats for one reason or another.  I needed one of those "Calgon take me away!" momements, but since locking myself in the bathroom to take a nice bath would have resulted in the boys starting a wrestling war or beating on eachother with lightsabers, I decided I just needed some time in the kitchen.  Now, what to make........

Tartine to the rescue!  I had gotten the Tartine cookbook a little while ago, and just hadn't had the chance to make anything from it yet (my cookbook collection might be getting a little too big, but shhhh.....don't tell the hubby).  It's a great book just to flip through, love the pictures, and there are tons of recipes in there that I absolutely intend to try at some point.

This Pumpkin Tea Cake caught my eye, since I love just about anything pumpkin, and a quickbread recipe was all I really had time for since I could hear the boys fighting over who got what cars in the next room.  This recipe could not be easier to put together....and the response from the hubby and everyone else who tried a piece was that it was a hit!  There was an optional topping of pepitas that I didn't include.....I just wanted a simple pumpkin cake....but the little crunchy crust on top that the sugar topping provides is fantastic!  And all the spices in the cake (it may seem like a lot, just go with it), gives this cake a lovely, not too sweet taste, one that is great in the morning, or the afternoon with your tea (or coffee).  This cake also kept great.....three days later it was still fantastic.

Suddenly the day didn't seem so bad......the world was all rainbows and unicorns again, and the boys were all smiles.  Ahhhh.....the magic of baked goods!

Click here for the recipe......and Enjoy!

This post is linked to:
These Chicks Cooked - Link It Up WednesdayAnything Goes Linky - Full Plate Thursday - Sweet Treats Thursday - It's a Keeper Thursday - Thanksgiving Traditions - Show Off Your Stuff - Fusion Fridays - Friday Favorites - Sweet Tooth Friday - Friday Food - Sweets for a Saturday - Seasonal Inspiration - Sweet Indulgences Sunday - A Themed Baker's Sunday - Monday, Mmm....Dessert - Tea Party Tuesday - Tuesday Talent Show - Tasty Tuesday - T' Time - Crazy Sweet Tuesday

Tuesday, November 15, 2011

Club: Baked - Buckeyes

This round of Club: Baked was selected by Karen over at Karen's Cookies Cakes and More, and she selected Buckeyes.  Buckeyes are a peanut butter ball, that when dipped in chocolate, is said to resemble a horse chestnut (a Buckeye tree).

I had to admit that my Buckeyes are not true Buckeyes.  You see, the hubby is just not a lover of peanut butter and chocolate together (yeah, he's one of those people).  He loves peanut butter, and he loves chocolate, but together, he's just not a fan.  I actually considered not making these for a minute, since I didn't want to end up eating all of these myself....and then I remembered.....

I had a jar of Biscoff spread in the pantry!!  You know what Biscoffs taste like right?  Kind of a combination of gingersnaps and a cinnamon graham cracker......super delicious!  It pretty much has the same consistency as peanut butter....why not give it a try?

You know what?  They're pretty darn yummy!  You definitely get that delicious Biscoff taste coming through....and it tastes delicious with the chocolate coating.

I think the trickiest part of these is dipping them in the chocolate and leaving a part of the inside exposed.  I'm so used to making cakeballs and truffles, that I wouldn't even be thinking and start coating the whole thing.  Oops!

Give these a try for a holiday party....the recipe will make a ton of them!  I did a 1/2 recipe, and still ended up with about 30 of them!

Go to Club: Baked to check out the other baker's results.....and check out Karen's Cookies Cakes and More for the recipe......and Enjoy!

This post is linked to:
Crazy Sweet Tuesday - Tasty Tuesday - Tuesday Talent Show - Tea Party Tuesday - Anything Goes Linky - These Chicks Cooked - Link It Up Wednesday - Full Plate Thursday - Sweet Treats Thursday - It's a Keeper Thursday - Show Off Your Stuff - Fusion Fridays - Friday Favorites - Sweet Tooth Friday - Friday Food - Sweets for a Saturday - Seasonal Inspiration - Sweet Indulgences Sunday - Monday, Mmm....Dessert

Sunday, November 13, 2011

Turkey Cakepops


Aren't these little turkeys cute?  I made these for last year's Thanksgiving, along with the Oreo Turkeys I posted earlier this week.

With so many kiddos at our Thanksgiving celebration (at last count there are 18 kiddos in our family celebration), I'm always trying to think of things that the kiddos will have fun eating.  I may have been overthinking this a little bit, but I ended up using a white cake mix with vanilla frosting for these cakepops, instead of my usual red velvet and cream cheese frosting.  I just wasn't sure the reaction I'd get if you bit into a turkey cakepop and it was red inside.....that seemed like it might be a little gross?

I sure do love the look of these guys....but I gotta say.....doing a project like this is time consuming!!  You definitely need to give yourself some time to put this together.....baking the cake, cooling the cake, crumbling the cake, mixing with frosting, rolling into balls, chilling the cakeballs, dipping into chocolate, then decorating and bagging.

To pack them up to take somewhere, I always use my trusty basket.  I put a couple of styrofoam blocks on the bottom, cover it with basket filler (that shredded paper stuff), and just start poking the turkeys in there.  Cakepops are definitely always a hit when you bring them somewhere, not to mention they are pretty cute decorations.

Check out Bakerella for all your cakepop tutorials......be creative....and Enjoy!!

This post is linked to:
Sweet Indulgences Sunday - Sharing Sundays - Monday, Mmmmm.....Dessert - Tea Party Tuesday - Tuesday Talent Show - Tasty Tuesday - Crazy Sweet Tuesday - Anything Goes Linky - These Chicks Cooked - Link It Up Wednesday - Full Plate Thursday - Sweet Treats Thursday - It's a Keeper Thursday - Pin'Inspiration Party - Thanksgiving Traditions - Show Off Your Stuff - Fusion Fridays - Friday Favorites - Sweet Tooth Friday - Friday Food - Fun Stuff Fridays - Sweets for a Saturday - Seasonal Inspiration - A Themed Baker's Sunday

Friday, November 11, 2011

Oreo Marshmallow Bars

Time for another recipe from Pinterest!!  Yep, Pinterest is definitely a dangerous place......I think the biggest board that I have is for food.....and most of it is sweet stuff.....my weakness in life.  Here's my Pinterest boards.

This was one of those "why didn't I ever think of that" kind of recipes.......so easy......essentially rice krispy treats, substituting the rice krispies with crushed Oreos.  The darkness of your bars depends on how much you crush your cookies.  The more crushed they are, the more chocolately they'll look.......leave them more chunky and you'll get more of a cookies and cream look to the bars.

Check out Picky Palate for the recipe......and Enjoy!

This post is linked to:
Sweets for a Saturday - Sweet Indulgences Sunday - Seasonal Inspiration - Monday, Mmmmm.....Dessert - Tea Party Tuesday - Tuesday Talent Show - Tasty Tuesday - Crazy Sweet Tuesday - Anything Goes Linky - These Chicks Cooked - Link It Up Wednesday - Full Plate Thursday - Sweet Treats Thursday - It's a Keeper Thursday - Show Off Your Stuff - Fusion Fridays - Friday Favorites - Sweet Tooth Friday - Friday Food

Wednesday, November 9, 2011

Oreo Turkeys


Do you know what you're making for Thanksgiving yet?  We go to my brother-in-law's in Newport Beach every year, and I'm the dessert-bringer (big surprise, right?).  We've got a huge crowd there, so there's always tons of food.  I think I ended up bringing five different things last year.

One of the things I made last year were these Oreo and candy turkeys to use as placecards for the kid's table (there are around 18  kids at our Thanksgiving).  I made little toothpick flags with the kids'  names and poked that into the chocolate and placed them at the table.  Because I made these pretty late the night before Thanksgiving, I wasn't too concerned with making all the details perfect (Ugh, those feet!).....but you know what?  The kids loved them!  Oreos and candy glued together with chocolate?  What's not to love?

Do you want to give these a try?  Go to Our Best Bites for a fantastic step-by-step of how to put these together......Enjoy!

Now pardon me while I go try to figure out what I'm bring this year.......

This post is linked to:
These Chicks Cooked - Full Plate Thursday - Sweet Treats Thursday - Turning the Table Thursday - It's a Keeper Thursday - Show Off Your Stuff - Sweet Tooth Friday - I'm Lovin' It - Anything Goes Linky - Friday Favorites - Fusion Fridays - Sweets for a Saturday - Sweet Indulgences Sunday - Seasonal Inspiration - Sharing Sundays - Monday, Mmmmm.....Dessert - Tea Party Tuesday - Tuesday Talent Show - Tasty Tuesday - Crazy Sweet Tuesday - Thanksgiving Traditions - Link It Up Wednesday - A Themed Baker's Sunday

Tuesday, November 8, 2011

Fall is Here!


I'm so happy!  It's finally Fall around here!  Even when it's sunny, it's still cool enough to wear pants and long sleeves....I love it!  This is my favorite time of the year......that is, except for the time change.  I don't mind that it gets dark so early now (it just means the kids are in bed earlier)......but I do mind the fact that since the time change, the kiddos have been waking up at 5:15 on the dot.  How the heck do they have the internal clock to know that it's 5:15 every morning.....I just don't get it.  And no, it doesn't matter if we put them to bed later.....they are still up at the crack of dawn (or before dawn).  Mommy needs lots of caffeine on mornings like these.

Since I love all things about Fall.....I had to try this Roasted Autumn Panzanella Salad from How Sweet It  Is.  Roasted butternut squash, sweet potatoes, and apples......tossed with arugula, pomegranate, and toasted bread.  Fantastic tasting......and healthy.....I love it!  The hubby's only complaint was that when I dished out the salad I seemed to give him way more of the roasted veggies and bread, so his was a little more carb heavy.  So, just make sure that each serving has enough greens to balance out the carbs.

Check out How Sweet It Is for the recipe......and Enjoy!

P.S. - I decided to channel my inner Martha (Stewart), and make some glitter pumpkins that I had seen her do a couple of years ago.  What do you think?


I just painted glue onto some small pumpkins I had left over from Halloween.....and then doused them in Martha's amazing glitter (available at Michael's).  Shake off the excess and let dry.  I love how they look on my mantel!


This post is linked to:
Tuesday Talent Show - Tasty Tuesday - These Chicks Cooked - Full Plate Thursday - Turning the Table Thursday - It's a Keeper Thursday - Show Off Your Stuff - I'm Lovin' It - Anything Goes Linky - Friday Favorites - Fusion Fridays - Seasonal Inspiration

Monday, November 7, 2011

Graham Cracker Toffee Bark

Do you ever find yourself in the kitchen, just itching to make something?  It happens to me a lot......but this time I was stuck at home with a grumpy 2 1/2 year old with a cold.  I needed something sweet to cheer us up!  But, I didn't want to go to the store for anything, so I had to make something with what I had.

I have seen a ton of recipes over the years for saltine toffee bars.....and I figured I should give them a try.  Only problem.....I didn't have any saltines!  Luckily, I found that there were also a ton of similar recipes out there using graham crackers instead.  Alrighty then......let's do this!!

It seems as though this recipe has been around for a long time.....people were mentioning that their moms and gramdmas made this.  Well, I had never had it before.....but now that I've made it, it's going to be sticking with me!  Graham crackers that soak in a toffee-ish syrup....covered in chocolate and then sprinkled with nuts.....yum!

While my sick little guy was being distracted by a Team Umizoomi episode, I was able to quickly threw this together.  It's not even one that requires your undivided attention for long.....just a little bit on the stovetop.....it would be a great recipe to have the kids help you with (except for a sick 2 1/2 year old with a very runny nose ;).

You can easily change up this recipe to use whatever you've got in the house.  For my chocolate layer, I used a combination of semi-sweet chocolate chips and milk chocolate.  I topped mine with chopped pecans....simply because that's what I had.  I think any nut would be fantastic on top of these.....or how about some crushed candy cane for the holidays?

CHOCOLATE GRAHAM CRACKER TOFFEE BARK
from About.com Home Cooking

1/2 pound (2 sticks) butter
1/4 cup brown sugar
1/4 cup granulated white sugar
1/2 box (about) graham crackers (not crumbs)
2 cups semi-sweet chocolate chips
1 cup chopped nuts

Preheat oven to 350 degrees.  Line a jelly roll pan, or a cookie sheet with a large lip with non-stick foil. Lay out your graham crackers on the pan in a single layer, side by side, filling the entire pan.  Be sure to fit any spaces with a piece of a graham cracker.

In a saucepan over medium heat, melt the butter, then add the sugars and stir to combine.  Allow the mixture to come to a boil, then reduce the heat and let the mixture bubble gently for 4 more minutes.  Remove the pan from the heat and carefully pour the mixture over the graham crackers in the pan.  Spread the mixture so that it covers the graham crackers evenly.  Place in the oven and bake for 10 minutes.

After 10 minutes, remove the pan from the oven and let it rest until the bubbling subsides (this will take only a minute or two).   Sprinkle the chocolate chips over the graham crackers and let it sit for a minute or two (so that the chocolate starts to melt).  Spread the chocolate so that it forms an even layer over the graham crackers, then top by sprinkling the chopped nuts evenly over the chocolate.  You may want to gently press the nuts into the melted chocolate, so that the nuts stick better when the chocolate firms.

Let the pan come to room temperature, then place in the refrigerator for a couple of hours until very firm.  Peel the foil from the back and break into pieces.  Keep in refrigerator until ready to serve.

Enjoy!

This post is linked to:
Monday, Mmm....Dessert - Tea Party Tuesday - Tuesday Talent Show - Tasty Tuesday - T' Time - Crazy Sweet Tuesday - These Chicks Cooked - Bake with Bizzy - Full Plate Thursday - Sweet Treats Thursday - Turning the Table Thursday - It's a Keeper Thursday - Show Off Your Stuff - Sweet Tooth Friday - I'm Lovin' It - Anything Goes Linky - Friday Favorites - Fusion Fridays - Sweets for a Saturday - Sweet Indulgences Sunday - Seasonal Inspiration

Friday, November 4, 2011

Glazed Doughnut Muffins


The taste of a glazed doughnut in muffin form (baked, not fried)?  Super delicious without all the guilt (ok, maybe a little guilt, just not as much as a doughnut)?  Sign me up!!

Look at these Glazed Doughnut Muffins from My Baking Addiction......they are so easy to throw together......and when they come out of the oven, the get a lovely sugary glaze-y bath.  Yum!

Check out My Baking Addiction for the recipe......and Enjoy!

This post is linked to:

Thursday, November 3, 2011

A Thing of Beauty

Seriously......is that not the most gorgeous box of cookies you have ever seen?

I was the lucky recipient of this incredible box of macarons a couple of weeks ago......you should have seen the ridiculously huge smile on my face when I opened the box!!  These bad boys are from Bottega Louie (in downtown Los Angeles).....and I can't even begin to tell you how much trouble I'd be in if they were just a bit closer (downtown is about 45 minutes away from me, on a good day).

Not only were these possibly the tastiest macarons I've ever had (even tastier than 'lette macarons in Beverly Hills), but I've never seen them with such a crazily intense color palette.....it's like a rainbow in a box!  And they came in a beautiful pink box tied up with a ribbon....I think they would make the cutest hostess gifts!

Two of my favorites....the light orange one in the middle.....hello, pumpkin!!  And the brown one up in the corner that I assumed would be a plain chocolate one......chocolate with salted caramel.....delicious!!

Many many thanks to Rachel for introducing me to this awesome shop....you'd better believe that any time I'm anywhere near there I will be making a stop!


Tuesday, November 1, 2011

Club: Baked - Caramel Apple Cupcakes

The latest round at Club: Baked was selected by Melissa at Lulu the Baker, and she chose the Caramel Apple Cake that I've had my eye on since I got this cookbook.

The cake pictured in the cookbook is a thing a beauty......a lovely three layer cake with a nice smooth frosting coat, and a perfect spiderweb of caramel sauce on top.  Well.....I once again decided to make cupcakes....I think it's just my thing......a cake is just too big of a commitment!

I decided to halve the cake recipe, and I ended up with about 15 cupcakes.  Instead of making homemade applesauce to the cupcakes, I used the Chunky Spiced Applesauce from Trader Joe's, and it was perfect for this.  Every few bites you'd get a bit of apple.....delish!

I didn't halve the caramel sauce or the frosting recipes.....because really, there's never too much caramel sauce, and I actually used almost all of the frosting decorating the cupcakes.  This frosting is a dream.......so amazingly smooth and creamy........the trick is to beat it for a long time.......much longer than you would think of mixing it for.....but trust me.....you will have a hard time stopping yourself from eating it from the bowl (not that I would do something like that!).

The caramel sauce was the only thing I had a problem on in this recipe.  It called for you to bring it up to a rich amber color or to 300 degrees on your candy thermometer.  Well, I went with the thermometer, and when I took it off the heat, it wasn't as deeply colored as I would have liked.  It still tasted great, but it would have been a richer flavor if it had gotten a little more color.

All in all, this is another keeper from those boys at Baked......love them!!  And I think this will be my new go-to frosting......I truly loved it.

Go to Lulu the Baker for the recipe, and go to Club: Baked to check out the other bakers' results........Enjoy!

This post is linked to:
Tuesday Talent Show - Tea Party Tuesday - Crazy Sweet Tuesday - T' Time - These Chicks Cooked - Cast Party Wednesday - Bake with Bizzy - Sweet Treats Thursday - Turning the Table Thursday - It's a Keeper Thursday - Full Plate Thursday - Show Off Your Stuff - Friday Favorites - Sweet Tooth Friday - Fusion Friday - Anything Goes Linky - I'm Lovin' It - Friday Food - Seasonal Inspiration - Sweets for a Saturday - Sweet Indulgences Sunday - Monday, Mmmmm....Dessert